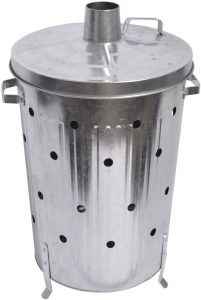
If you live in a property with a sizeable garden or you’re simply an avid gardener, you will know just how quickly green garden waste can build up.
There are several ways you can dispose of this waste, from storing it in a compost bin, disposing of it at a local waste recycling centre or burning it in your own back garden.
If you favour the last approach, then this is the guide for you. We’ve tested several of the best garden incinerators available to help you find one that is perfect for burning your leftover garden waste.
Best Garden Incinerator Reviews
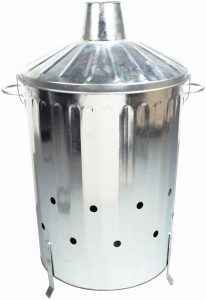
CrazyGadget Metal Incinerator Bin
With its simple yet robust design, the CrazyGadget garden incinerator is the best readily available burning bin you will find.
It features a sturdy 3 leg design that is suitable for use on a range of surfaces and the presence of several large vent holes make for easy fire starting. Our favorite feature is the locking lid which will prevent it from accidentally falling off or getting blown away in strong winds.
Its cost effective, well made and boats a 90 litre capacity, making it our top pick and the best garden incinerator for most gardeners.
Keto Plastics Mini Garden Incinerator Bin
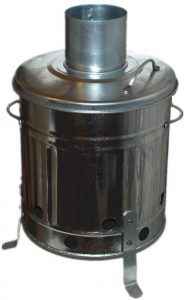
Next up is a small garden incinerator for those of you with smaller gardens to tend.
To give you an idea of size, the 15 litre Keto Plastics garden incinerator stands at 45cm tall and 33cm wide including the legs and handles. The legs and handles are securely attached to the body of the bin and the entire construction is coated in a galvanised coating.
There are several well placed ventilation holes which allow this model to heat up quickly, making it suitable for use as a fire pit for outdoor parties and gatherings as well as the disposal of garden waste.
If you only garden a few times a year and need to dispose of leaves and small off cuts such as pruned foliage, this is the model for you.
Fire Vida Garden Incinerator Bin
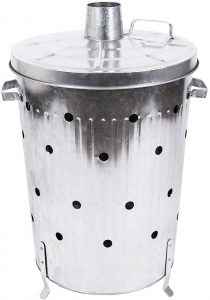
The Fire Vida garden incinerator bin is considered to be a medium sized incinerator with a capacity of 75 litres. This makes it suitable for most gardens with only the largest possibly requiring something bigger.
The bin is both lightweight and strong which makes manoeuvring it easy. The lid is well constructed which securely attached handles and the legs located at the base are also strong enough to withstand repeated use.
There are ventilation holes located at the base of the bin which means that lit embers could fall through during use. For that reason, we suggest only burning on solid, non-combustible surfaces.
Great value for money and a design that should last.
Keto Plastics 210L Burner Bin
If only the biggest will do, then this 210 litre incinerator is the one for you.
It stands at 97cm tall by 58cm wide and is made from a strong steel that is built to last. Perfect for bonfires as well as the disposal of the usual leaves, grass, twigs and branches.
The ventilation holes are a little on the small side and are only located right at the base of the bin, so this model can take a while to heat up and get going. When it does, it burns well and without the need for constant attention.
Bear in mind that it is possible to drill additional holes through this model if you require.
The largest and most durable model on review and one we don’t hesitate to recommend.
Garden Incinerator Buying Guide
If you’ve never burnt anything before, whether on a bonfire or using a suitable incinerator, the thought of intentionally starting a fire in your own back garden can seem daunting. To provide you with the confidence you need to burn safely, we’ve put together this helpful guide.
What is a Garden Incinerator?
An incinerator is simply a container that is suitable for burning waste. They come in a variety of shapes and sizes, but all do pretty much the same thing.
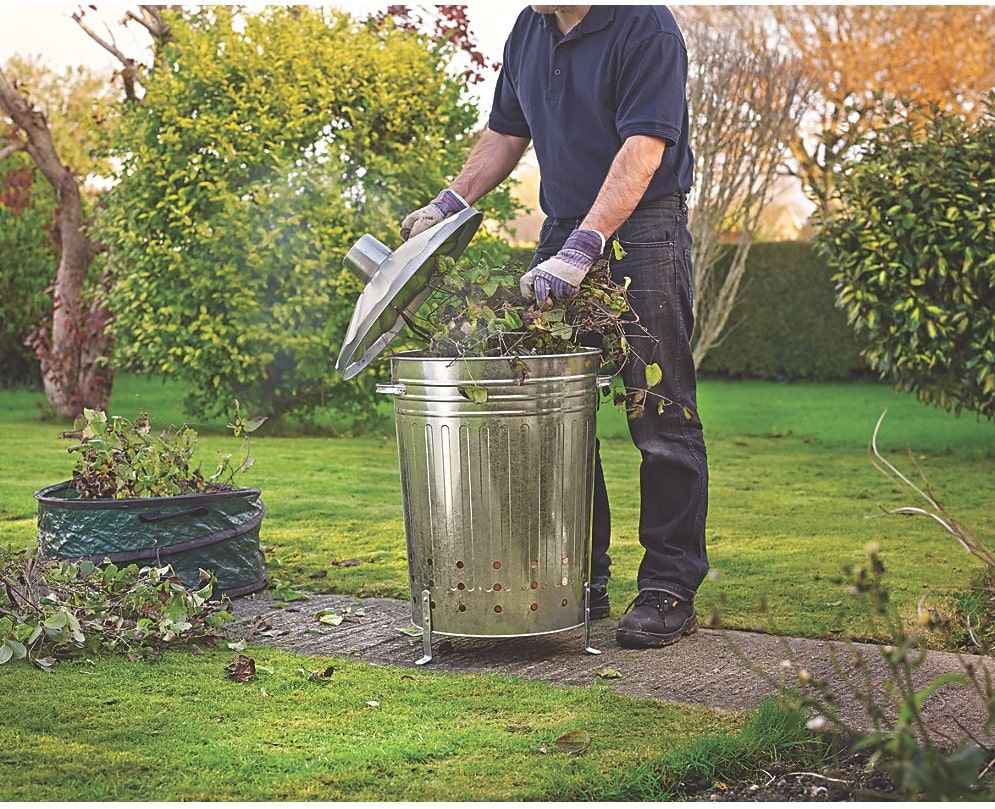
Most models consist of two parts, a large bin and a lid with a chimney, allowing you to burn garden waste in a controlled and safe manner.
Can I Burn Anything?
There are laws and various pieces of legislation covering what can and can’t be burnt in your garden. Generally speaking, most types of green waste are acceptable to be burnt in an incinerator.
This includes any brambles cut down with a brush cutter or weeds you’ve pulled from the ground, as well as grass cuttings, twigs and any other vegetation.
Looking for a weed killer? We’ve tested the best weed killers in our guide
Tips for Choosing an Incinerator
There are a few important factors that should be considered before purchasing your new incinerator.
Size
The larger your incinerator, the more green waste you’ll be able to burn at once. To prevent having to continually load your incinerator while it is alight, be sure to purchase a size that is large enough to allow you to burn most of what you need to in one attempt.
Material
The second consideration is the material your incinerator is constructed from. Most are made from steel that has been galvanised to prevent rust, a handy feature as your incinerator is likely to stored outside and exposed to the elements year-round.
Unfortunately, the zinc used to galvanise steel is removed at high temperatures, so your incinerator is likely to lose this protection over time.
We find that most incinerators tend to lose their galvanised finish after around 1 or 2 years.
The other option is an incinerator made from a heavy-duty steel sheeting which doesn’t require this coating. These models tend to last longer and are more durable but aren’t as widely available.
Assembling and Setting Up Your Incinerator
If the model you purchase doesn’t come with its legs or feet attached, you’ll need to attach these yourself. Some can be pushed into placed and some need securing with a screw or two.
The important thing is to make sure these legs are securely attached to the bottom of the bin to reduce the risk of your incinerator falling over during use.
The next step is to make sure that your incinerator is only ever placed on level ground. Our preference is a section of paving for several reasons, the most important being to limit the damage to your lawn. If you do end up with a small patch of burnt grass, sowing grass seed will quickly repair it.
You also want to place it far away from anything that could catch fire such as plants or buildings.
Lighting the Incinerator
Now for the fun part. Line the bin with dry twigs and rolled up newspaper to form a base. This should then be lit from underneath the bin through one of the holes.
Once the fire has started, place the lid on top to allow the incinerator to heat up and the fire to grow in size.
Adding Garden Waste
Once the incinerator is up to temperature and the amount of smoke being produced has died down, it’s time to add some waste.
Put on a pair of heat proof gloves and carefully remove the lid and set it aside onto a suitable surface. With your gloves still on, add waste incrementally, being sure that it is being set alight.
Adding waste too quickly can smother the fire and extinguish it, forcing you to restart the process from the beginning.
Make sure to always replace the lid when you’ve finished adding waste to control the amount of smoke being produced.
Disposing of the Ashes
It’s important to ensure the fire has been extinguished and you allow the burnt waste to cool before attempting to remove it from the incinerator. Once it has done so, use your gloves and transfer this ash into a compost bin or other suitable container.
This ash can either be disposed of or stored for future use as a natural garden fertiliser. A mulching lawn mower can also be used to fertilise your lawn so try not to burn all of your grass cuttings.
Looking for the best petrol lawn mower? We’ve reviewed several in our guide.
Final Verdict
Burning garden waste at home doesn’t have to be dangerous or cause you anxiety. Providing you’ve bought yourself a good garden incinerator and use it properly, you’ll be able to safely dispose of waste yourself without having to take regular trips to the local waste tip.
The best incinerator bin for most gardeners is the CrazyGadget bin which features ample capacity and is suitable for the burning of both gardening waste and household waste.
